Sunday, August 30, 2009

Finally moved in.

We did move in on August 4, but it has taken us all this time to unpack, have new furniture delivered and setup, and just get acclimated to a comfortable new environment. Here you can see how some of our rooms turned out.

Here’s our living room looking down from the top of the front stairway. We have a few of our previous furniture and a few new pieces.

Our dining room is very much the same with our favorite Scandinavian dining room set. The French doors take you onto our screened porch.

Our kitchen reflects the way we want to eat and prepare foods. The peninsula offers a great place to kibitz during meal preparation, and also a nice place to get a meal ready. At the rear is our home office and entrance to the garage.

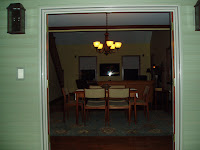
We also have a wonderful view from our porch into our dining room and beyond into the living room.

So come on down to visit with us, anytime. We’d love to have you over.

Monday, August 3, 2009

Finishing touches

Sorry for the delay getting this blog out, but we have been fighting many dry days and keeping the grass seed watered morning and night.

We have occupancy and are moving in tomorrow; with lots of carloads of boxes and items done ahead of time to minimize the van loads.

Here are some finishing touches on the house that is now completely done.

The front door is complete with stain and polyurethane. Inside we have the living room with fireplace, the kitchen and office viewed from the dining room, and the dining room with French doors onto the screened porch.

There is also the completed staircase to the loft and 2 second floor bedrooms and bath.

We are particularly pleased with our lighting choices including kitchen and hall pendants, as well as numerous recessed lights.

Saturday, July 18, 2009

Final details

This week has been completing everything needed for occupancy inspections. All items have to be in and functional, especially lighting, outlets, HVAC, and hot & cold water. We passed the building inspection, and now have to wait 1 week for the local township occupancy inspection; then on to closing. The final detail of the dining room is crown molding around the ceiling.

The main stairway and railings have been completed, as well as the one into the basement. Here you see the open stairway railings and posts up to the second floor, and the railings along the front of the loft. All of these are stained oak.

The screened porch final got its screens, stairs and railings, as well as a railing along the top of the exterior basement stairway. Porch lighting, both in and out, is also in and working.

Saturday, July 11, 2009

Landscape views

The grass is complete, as the lawn crew came back at 6 AM today to finish up. Here’s view from the southwest that shows the garage bed and chanticleer pears. The tan carpetlike material is called curlex and will handle downspot runoff so the water doesn’t erode the seed. Curlex is located around the house and especially in the swale at the rear.

Here’s a view from the east with its bed of plantings. This will offer a great morning view from the 4 large casement windows in the loft.

The south view shows today’s seeding. The grass area along the bottom of this shot is part of the required right-of-way that goes out to the road.

Friday, July 10, 2009

Grass seeding

With the landscaping complete, it’s time to start growing grass. The seeding crew started by doing the final grading to smooth out the topsoil and remove rocks. Hand raking was done along the edges of the mulch beds and walkways.

We used the hydroseeding approach. A huge tank mixes together grass seeds, fertilizer, tackifier, mulch, and water. The mix is sprayed on the areas to be seeded. The tackifer is glue-like and helps the mix stick together and to the ground. No hay spraying is needed.

The final result is a greenish surface that almost looks like grass. Grass should start showing in 5 days. Lots of watering to do, and the need for a riding mower within the next month.

Wednesday, July 8, 2009

Landscaping Day 3 and Driveway

We are 99% done with our landscaping, having only 1 shrub, a few fence rails, and flagstones for the patio area to finish tomorrow. Here is a view of our east bed that highlights 5 gorgeous Cryptomeria Yoshino shrubs along its back, the royal birch, and 1 of the 2 October Glory maple just off the front of the screened porch.

Here’s a view along the south end of the property. In the center is a bed with 5 green giant arborvitae, dwarf forsythia and “tea” viburnums. The bed on the right corner is matched by the one on the left rear corner, and includes burning bush and “sparkleberry” holly. The bed in the foreground covers our well pipe and includes boxwoods, roses, and grasses. You also see 2 sugar maples on the right.

The driveway crew arrived this afternoon and laid the driveway. Now complete, you see it and the beds along the front and side of the house. The beds include hostas, hydrangea, boxwoods, holly, cypress, and several grasses.


Monday, July 6, 2009

Landscaping Day 1

We are coming down to the last 2-3 weeks before occupancy. Today, our landscaping contractor began. We decided to do a complete landscape job, having a wonderful design planned for us. The east side of the property has a large bed along the mid-border that will include various shrubs and a “Royal Frost” white birch.

The west side of the house will also include a variety of different shrubs and 3 Chanticleer flowering pear trees. A number of beds will also include split rail fencing. The rear of the property will start to take shape tomorrow.

While all the plantings were going on, we had a specialty man in to install all our closet shelving and hanging rods, as well as bathroom towel bars, shower doors and other bathroom accessories.

Tuesday, June 30, 2009

Driveway prep

With the rough grading done, here’s a view from the rear of our property along the road that borders the backyard. This gives an idea of the terrain, and part of our new neighborhood.

The driveway is now prepped for paving next week. The grading defined the edges, and today 2 loads of rock were spread to the street leaving room for 2” blacktop. The concrete sideway at the front of the driveway and the apron to the road will be done tomorrow.

Monday, June 29, 2009

Rough grading


The end is in sight as the rough grading process began today. The first point of attack was at the rear to reduce the height of the berme, and leaving the swale the required depth for rain water runoff. The hump of dirt in the back yard will be reduced and distributed around the house.

The front of the house has a few shallow trenches needed. One carries the wiring from the house out to the post light at the front corner of the driveway. The other is needed along the front of the stamped walkway for water runoff from the downspouts.

Taa-daa! By the end of the day the hump is gone; the dirt is graded to all sides of the house, and the driveway is defined for more stone and paving. The back has a gentle slope to the swale. The front sidewalk is prepped for concrete and completion. The rough grading is done.

Sunday, June 28, 2009

Countertop and more Trim


We have been excitedly awaiting the delivery of our kitchen countertop. We were fortunate that there were no seams needed to achieve the piece to the left of the gas range, and the piece to the right over the sink and dishwasher. The backsplash is being caulked with a clear finish. This one piece is about 560 pounds; quartz weighs 20 pounds per square foot.

The oak mantel is stained and installed on the left side of our living room area. The granite surround and hearth (which is very dusty) is a dark green product named Ubatuba.

More of the second floor doors and trim are now installed. The oak, bull-nose edging around the top edge of the loft and balcony is finished.

Wednesday, June 24, 2009

Stone, porch and trim work


The stone crew was back this week and finished the front of the house around the porch, and also around the garage. Now the exterior is complete, and the rough grading will be able to start soon.

Another part to complete prior to rough grading is the screened porch that is off our dining room. The Trex-like finish along the sides to the ground will allow the grading to be done along the back of the house as well.

The trim man started today to install the interior doors and closet treatments, casings, and baseboards. The first completed area was the loft which has 2 closets and a mirrored-slider closet.

Thursday, June 18, 2009

Kitchen cabinets

The kitchen cabinets arrived this week, and the carpenters began by installing the wall units first. Each one of the 42” cabinets need to be the right distance above the floor. They use an adjustable support tray to hold the cabinet in place to assure the proper height.

Then the sides of the cabinets are clamped together for a tight fit and flush alignment. These are the cabinets to the right of the kitchen sink. The left one has a glass door and will be lighted. There are similar ones to the left of the sink area.

Once all the cabinets are in place on the wall and the floor, it’s time for the crown moldings along the top. The floor cabinets on the right with the shorter cabinets above are our home office area, and remains true to the lines of the overall kitchen area.

Monday, June 15, 2009

Painting & Staining

For more than the last week, the painting/staining team has been on site. Once they covered all the windows, doors, and floors with protective coverings, the ability to take pictures of the painting process was not possible due to poor lighting and reflections. However, once we finalized on the stain choice they quickly started by staining the living room stairway.

The staining begins with a spray process and then a wipe down. After that a first coat of polyurethane, then light sanding, a seal coat, and one and possibly two more poly coats. The result is a smooth, rich final look.

All of our trim, doors, moldings, fireplace mantel, and exterior doors are hardwood oak or pine, and will be stained; so there is a lot to do.

Thursday, June 4, 2009

Stamped concrete

The footings are set and it’s a perfect day to spread concrete. Stamped concrete starts with a color treatment added to the concrete directly in the mixer. That gives us a base color through and through.
The team works quickly to pour our porch, walkway, and rear patio so they can control the setting process and work the surface nice and smooth. When the surface is smooth they spread on the accent color, which starts as a powder.

Stamped concrete is exactly that. The team dons snowshoe-like foot paddles and lays down the design pads – our design is called Caesar stone which ends up looking like a huge piece of slate. Then they stamp with the pads to set in the design.

Wednesday, June 3, 2009

Hardwood floors

The flooring team just finished laying down our hardwood floors. These are ¾” thick, solid hardwood. The color is called gunstock. The first part of the task is laying out pieces so that they will overlap properly from line to line. They are installed with a “super” staple gun that uses staples about 2” long.

The hardwood will cover the entire first floor except for our carpeted bedroom and the vinyl floor in the bathroom. Evan is admiring the results near our gas fireplace, that is in our living room.

Wednesday, May 27, 2009

Walkway, porch, and fireplace

The specialty stamped concrete team was in today to set the footings for the front porch, the front serpentine walkway, and the rear patio off the screened porch.

The fireplace surround and floor panel of “Ubatuba” granite is placed and ready for the finished mantel installation.

The front porch is being finished with a white column treatment along the top half of each post, and some white treatments along the bottom of the door. When the porch is poured and the stamped concrete design is complete, the stone work will be completed up to the porch and along the lower part of each column.