Tuesday, March 31, 2009

Garage & Second floor


Before laying in the floor beams for the second floor, the garage framing was done and the sheathing put on. The early morning chill prompted a nice fire from scrap wood – we just needed some marshmallows to complete the effect.

The most important part to starting the second floor was assuring that all sides were straight and true. It was necessary to walk the top to assess position and then secure the floor cross-supports into position prior to laying down all the floor beams. The result gave us a feel for how our 9 foot first floor ceilings would appear.

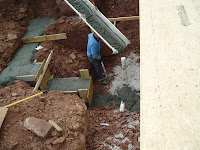
The trickiest part was creating the beam to support the front edge of the second floor loft which will overlook the living room and cathedral ceiling. 4 laminated beams were nailed together to provide the strength for the support, linking the outer wall to the corner post of the basement stair entrance.

Oatmeal and interior framing


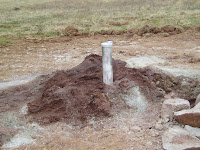
The second phase geothermal well team was out to finish the installation. An “oatmeal-like” brew was piped inside each of the 2 well shafts to completely encase the 2 geo-pipes. This assures that for the full 225 feet there are no air pockets or any other debris that could impact the efficiency of the system. After they dug trenches to connect the 2 wells at a junction box and then fed 2 lines into the foundation walls of the house.

Only one exterior first floor wall was left to build, but this one was the most challenging. Since it had 5 window headers and the fireplace header as well, the guys couldn’t lift the wall as they did the others. They just happened to have a super fork lift to strap on and do the lifting for them. “That was easy”.

By the afternoon the interior walls were being completed. This included the first floor bedroom and closet, bathroom and linen closet, front hall closet, location for the refrigerator and pantry, the laundry room and utility closet, and doorway entrance to basement.

Friday, March 27, 2009

First floor framing


The day started with an assortment of necessary odds & ends. The dirt in the garage was tamped down and then filled over with gravel. The front porch foundation cavity was filled with gravel, as well as the basement stairway, the patio, and under the rear screened-in porch; even the porta-john was cleaned.

While all that was happening lumber was being cut to proper lengths to layout the framing pieces for the front and rear walls. The frame was nailed together, sheathing covered the walls, and a moisture barrier added. The front wall was raised first, including the front door and all the front windows for the living room and front bedroom.

The rear wall was raised next including the rear windows and French door entrance to the porch. The side wall was also framed and nailed in place with placements for the 3rd bedroom window and garage entrance to the home office at the rear.

Thursday, March 26, 2009

Oh well.

The well drillers were back again today, in the rain, to drill our two geothermal wells. These are the wells that will support our geothermal HVAC system. Each well is 225 feet deep and has a loop of PVC pipe that connects at the bottom to give each well 450 feet of pipe. This is the needed length to properly support a very efficient geothermal system for our house size.

With the first well complete and its loop in the ground, the second well is drilled a short distance away. Ultimately it has its own PVC loop. The two loops join together between the 2 wells at a junction box, and then two lengths of PVC enter the house to the geothermal heat pump.

So now we have 3 wells on our property. The first one, along with a water conditioning system, will provide us ample drinking water. The second and third will provide us wonderfully efficient, some say “free”, heating and air conditioning.

Wednesday, March 25, 2009

Eureka, we struck water!

The well drillers were out today, and likely the next day or two. Today was the water well. They started with the largest drill bit to go down to about 80 feet. Twice they encountered limestone in 6 to 10 foot veins; lots of white dust & debris from those.

Next they installed two 20 foot casings at the top of the well and added a wall sealant to prevent anything from infiltrating the pipe. When that was done, they were able to begin drilling with smaller bit. By the time they got to 90 feet -- water.

Then it was a matter of adding on more and more of the 20 foot sections to extend the depth of the well. By the time they got to 320 feet they had enough reservoir depth to accommodate all our family water needs. Next will be the 2 wells for the geothermal heat system.

Monday, March 23, 2009

Stairs, Patio & Grading

The masons were here early today to put in the basement stairway walls, the foundation for the patio, and footings for the screened porch and garage. They quickly defined the wall position for the basement stairs and laid down courses of cinder block.

Along the way they linked in the patio foundation, which will support the stamped concrete patio. By early afternoon the walls were the proper height, and they were smoothing the walls out for a nice finished texture. Eventually the patio walls were complete as well.

While all the masonry work was occurring, our heavy equipment guy was delivering load after load of dirt to fill in around the house and in the garage. It’s amazing to me how light a touch he has dumping and positioning tons of dirt with the heavy equipment. In the end, the property is nicely graded and ready for the framing tomorrow.

Friday, March 20, 2009

Footings

Today the footings were poured for the rear screened porch, the connected patio, the basement stairway, and the garage floor.

The first step defined setups for the location and height of each footing; then careful pouring and tamping.

It didn’t take long for the cement truck to position itself for each pour and tamped level and smooth in place; ready to support the porch, patio and stairway.

Next week the framing begins and the house will really start to take shape quickly.

Thursday, March 19, 2009

Sewer line & Porch Foundations

An assortment of things today. A lot of dirt was moved. They started to fill in around the inside of the garage foundation to ready for the gravel layer. The footings for the rear screened porch were located, and the exterior basement entrance was defined.

Later the trench for the sewer connection from the foundation to the city tap was dug, the pipes laid and connected, and the inspector out to check for leaks – giving the okay. Then the trench was filled and tamped down by the huge excavator tractor.

The foundation was also prepared along the front wall to set in the front porch foundation. No huge cranes this time, just our builder’s tractor to carry and set them in place. We will soon be ready to walk in our front door.

Wednesday, March 18, 2009

The first floor deck is on.

Today’s goal – put on the first floor deck and sub-floor. They started setting up the 2x10 sides and laying out the cross pieces, and nicely accounted for the center stairs. Gradually, all boards were down and ready for the next step.

They provided added support in the floor along both sides of the foundation to give extra support to the Superior walls. Then they went along every cross piece to secure them properly – nail gun magic. Finally the framing was ready for the sub-floor laydown.

Gluing and nailing was the approach. Each piece of 4x8 tongue&groove board was carefully placed and pounded into place with a sledge hammer. Each row laid to interlock with the previous row until the flooring was complete.

Friday, March 13, 2009

The basement floor is in.


When Evan and Wayne arrived the concrete team was there and pouring the concrete had already begun. The goal was a 3 ½ inch deep floor. They were all plopping around in their boots spreading the concrete to the designated wall and column marks.

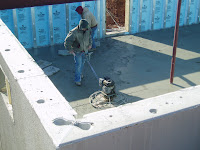
Once enough concrete was down, the smoothing process began. It was done by hand around the edges, the center parts with a 10 foot trowel, and eventually a spinning 4-blade trowel.

The final part of the process included multiple passes with the spinning trowel and tedious, on hands and knees, hand troweling. The ultimate floor is quite smooth, and will turn white when completely dry.

Thursday, March 12, 2009

The Foundation is in!


By the time we got to the site at 7:45 AM, the Superior Wall team was already there laying stakes to guide the placement of each wall piece – 12 for the main house and 6 for the garage. The huge crane carefully placed the first corner piece, and once set, it was just one after the other – each caulked and bolted together.

In about 90 minutes the final wall piece was set – and as planned it perfectly matched up with its mate. Then on to the garage which had the same attention to detail as the house; everything completed by 11:30, and they were gone. Note the level balancing act of the crane.

During the afternoon the center steel beam was placed and supported. The under-floor plumbing pipes for HVAC condensation, sump pump, and basement lavatory were completed, and the gravel covered with a moisture barrier. Tomorrow morning’s inspection will enable us to pour the concrete floor.

Wednesday, March 11, 2009

Ready for the Foundation


We began by defining the driveway, and then quickly went to work on the bottom of the foundation hole to reach its proper depth and clean out the corners.

Then laying drain pipe around the outer edge to connect up with the sump pump located at the back left. Then 3 loads of gravel to define the floor base.

And a foundation is prepared for the garage as well. A fourth load of gravel is needed for this.

Now we are ready for the Superior Walls to be delivered Thursday and set in by crane, sealed together, and then ready for Friday’s foundation floor pour.

Tuesday, March 10, 2009

We broke ground.

Yesterday, March 9, 2009 we broke ground. Quite exciting. We now have a hole. With all the bank process that anyone has to go through these days, we actually started sooner than we thought. Here they are grading off the topsoil to save for later use.

As the day progressed all the topsoil was located near the rear of the property, leaving room for all the clay-like dirt from the hole to be staged to go back against the eventual foundation.

At the end of the day, the hole is complete, and the edges get the finishing touches. Thursday we are scheduled to have the Superior Wall foundation delivered and complete.